Installing a roller blind is a straightforward job for most windows. The process takes around 15 to 30 minutes per blind once you have the right tools and understand where each component goes. This guide covers bracket placement, fitting for both inside and outside mount, adjustments for common issues, and what to check before you start.
Check the wall type before drilling. Plasterboard requires hollow wall anchors unless you are drilling into a stud. Masonry and brick require masonry drill bits and plugs. Timber frames accept standard wood screws without plugs.
Inside mount brackets sit inside the window recess, fixed to the top of the frame. The blind drops inside the opening and the sill remains visible.
Outside mount brackets fix to the wall or frame face above the window. The blind covers the full opening from outside the recess.
The mount type was decided when you ordered. Your blind was made to the corresponding dimensions, so the installation method must match the order.
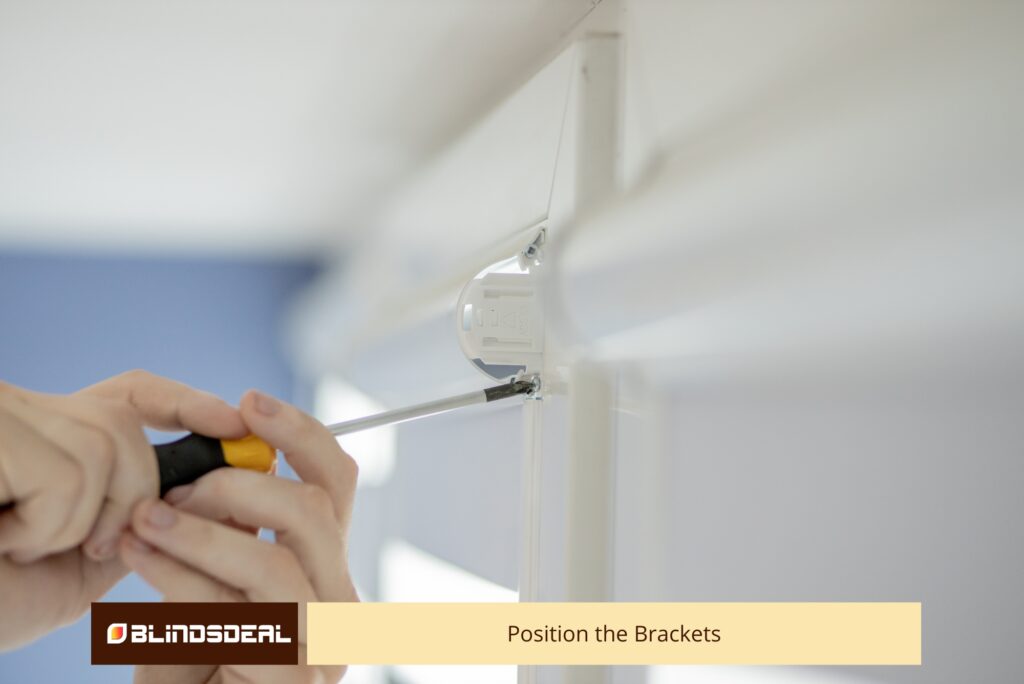
Hold the first bracket against the top inside corner of the recess, flush with the face of the frame. Mark the screw holes with a pencil. Repeat on the opposite side. Use a ruler to confirm both brackets sit at the same depth from the face of the frame so the headrail hangs level.
Measure up from the top of the window frame by the distance specified in your installation notes, typically 50mm to 70mm. Mark the first bracket position. Use a spirit level or measure down from the ceiling at both ends to confirm the two bracket positions are at the same height before marking. An unlevel outside mount is the most common installation error and one of the hardest to fix after drilling.
For wider blinds over 1200mm, a centre support bracket may be included. Position it midway between the two end brackets at the same height.
Drill pilot holes at the marked positions. Insert wall plugs if required for your surface type. Fix each bracket with the supplied screws. Do not fully tighten until both brackets are in place and you have confirmed they are level with each other.
Once level is confirmed, tighten all screws fully. The bracket should not move or flex when you apply moderate hand pressure.
Roller blinds use a clip or socket mechanism at each end of the headrail. One end takes the chain mechanism, the other is a fixed pin.
Hold the headrail at a slight angle and locate the pin end into the fixed bracket first. Swing the chain end up and click it into the chain-side bracket. You should hear or feel a positive click. Give the headrail a gentle pull to confirm it is seated. If it lifts out easily, check that the bracket is fully engaged.
All chain-operated blinds are supplied with a child safety tensioner. This is a small clip or bracket that anchors the bottom of the chain loop to the wall or frame, preventing the chain from forming a free-hanging loop.
Fix the tensioner to the wall beside the blind at a height that keeps the chain taut but still allows full operation. This is a required safety fitting, not optional.
Lower the blind fully by pulling the chain on the operating side. The fabric should travel smoothly without skewing to one side. If the blind pulls noticeably to one side as it lowers, the brackets are not at the same height. Loosen the higher bracket and adjust down fractionally until the blind runs true.
Raise the blind back to the top. On a chain-operated blind, the fabric should roll up cleanly without bunching or riding off-centre on the tube.
Some roller blind configurations include end caps or a decorative fascia that clips over the headrail once installed. These are fitted last, after confirming the blind operates correctly. Press them firmly into place until they click. They are designed to be removable if you need to adjust or remove the blind later.
| Issue | Fix |
| Blind skews to one side when lowering | The brackets are at different heights. Adjust the higher bracket down slightly. |
| Fabric bunches at one end of the tube | The headrail is not fully seated in one of the brackets. Remove the headrail, check both bracket clips are clear of debris, and refit. |
| Chain is stiff or hard to pull | The headrail is sitting too deep in the bracket. Check the bracket depth on both sides is consistent. |
| Bracket pulls away from the wall after drilling | The wall plug is not rated for the surface. Replace with an appropriate anchor for the wall type. |
| The blind drops further than expected when released | This is normal on new installations. The spring tension in the tube adjusts slightly with initial use. |
Blinds wider than 1800mm are heavier and place more load on the end brackets. Confirm the centre support bracket is fitted before testing operation. On masonry walls, use a masonry plug rated for the load. On plasterboard, centre support brackets should always go into a stud if possible.
Once installed, roller blinds require minimal maintenance. A wipe-down of the fabric with a dry cloth every few weeks and an occasional check that the bracket screws remain tight is all that is needed for most installations.
For help with measurements before ordering, the measuring guide covers inside and outside mount dimensions for all four product types.
All orders are manufactured and shipped free across Australia, including Penrith and the surrounding Western Sydney area.